Many people are deciding to make the switch from commercial, chemical hair dyes to henna colorants for their hair in the hope that they will achieve stronger, healthier locks and a longer lasting, vibrant colour. However, what most first-timers don’t realise until they have already gotten started is that applying henna is not the same as applying a regular hair dye. One of the main problems that people have with henna hair dye is that it is extremely messy, especially if you have long hair, so knowing exactly what to do can be a good way to make sure you don’t end up creating some kind of disaster. Make sure you have a plastic bowl, a mixing tool, plastic gloves, Vaseline for around your hairline, and old clothes handy before you start.
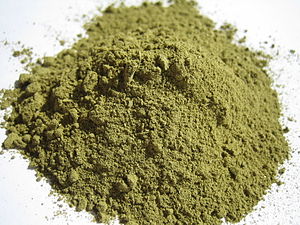
1) Prepare your mixture.
When you make your henna hair dye mixture, you should aim for it to be something like cake batter. Although it should be thin enough to apply reasonably easily to your hair, it also has to be thick enough that it stays in place throughout the dying process. Remember, if it’s too thick, it may cake easily, giving you various different shades throughout your hair, and it could be difficult to apply as well. The good thing when you’re preparing your mixture is that if it’s too thin, you just add more henna, and if it’s too thick you add more water, simple as that.
2) Natural enhancers
If you want to add something extra special to your hair dye to give your locks a boost while you’re colouring them, you could add some optional extras. Adding two tablespoons of grape seed or olive oil into the mix can help to improve damaged and dry tresses, as well as helping the henna glide on easier and wash off quicker than usual. An egg could also help to moisturize dry hair, and can provide a powerful protein rinse too.
3) Prepare Your Hair
For the best possible result, apply your henna to clean hair. Try washing your hair, then combing it out and applying the henna to the wet locks, as you might find the colour lasts a little longer this way. It’s a good idea to do a strand test too if you want to make sure that you’re not allergic to any of the plant dyes and are creating the colour that you expect.
4) Applying the Henna
Separate your hair into small one inch sections so that you can provide maximum coverage as you work across your head, placing a thin layer of Vaseline on the skin you want to avoid getting tinted. Using your hands or a brush, apply the henna from the roots of your hair to the tips, working with one small section at a time. Once you’re done, your head may feel a little heavy, and your hair should be well covered, at this point, either cover your head with plastic or leave it uncovered. Then simply wait, and bear in mind that darker deeper colours take longer than lighter shades.
Nadia Jones is a beauty blogger. She dyes her own hair with henna products from www.worldsend.co.uk
[toggle title=”Featured images”]

[/toggle]
Related articles
- Mother vows never to dye her hair again after suffering horrific allergic reaction (dailymail.co.uk)
- Baldness breakthrough as scientists grow cells that sprout human hair for the first time (dailymail.co.uk)

Leave a Reply